Views: 222 Author: Rebecca Publish Time: 2025-10-31 Origin: Site
Content Menu
● Introduction: Understanding Engineered Hardwood
● Composition and Construction
>> What Is Engineered Hardwood Made Of?
>> Engineered Hardwood vs. Solid Hardwood
● The Benefits of Engineered Hardwood
>> Moisture Resistance and Dimensional Stability
>> Convenience and Affordability
● Installation Methods for Engineered Hardwood
● Step-by-Step Guide: Installing Engineered Hardwood
● Appearance, Styles, and Finishes
● Engineered Hardwood Care and Maintenance
● Common Challenges and Solutions
● How to Identify Genuine Engineered Hardwood
● Applications: Where Does Engineered Hardwood Excel?
● FAQs
>> 1. Is engineered hardwood as durable as solid hardwood?
>> 2. Can engineered hardwood be sanded and refinished?
>> 3. How do I identify real engineered hardwood?
>> 4. Is engineered hardwood good for humid environments?
>> 5. How is engineered hardwood installed?
Engineered hardwood is, without doubt, a real wood flooring option. Its unique construction grants it a compelling blend of authenticity, durability, and versatility that fits modern living spaces perfectly. For anyone comparing flooring types or striving to understand whether engineered hardwood offers the warmth and luxury of real wood, this comprehensive guide delivers vital insights into its material makeup, advantages, installation methods, maintenance, and more.

Over recent years, engineered hardwood has rapidly climbed the ranks to become a top contender against traditional solid hardwood flooring. Its modern engineering not only preserves the classic aesthetic and texture of wood but also solves many of the challenges posed by solid hardwood, especially in environments with humidity fluctuations or structurally challenging subfloors.[11][12][13]
Engineered hardwood consists of several thin layers (or “plies”) of wood joined together under heat and pressure, with a top layer—called the veneer—made from real hardwood. The most popular species for veneers include oak, maple, hickory, and walnut, but countless options exist to match virtually any design style.[12][11]
At its core, engineered hardwood combines nature and science:
- Top Layer (Veneer): A thin slice of real hardwood ranging from 1.5mm to 6mm in thickness. This is the only layer visible once the floor is installed and provides the authentic look and feel characteristic of hardwood.[14][12]
- Core Layers: Multiple layers of plywood, high-density fiberboard, or hardwood, with each layer's grain running in perpendicular directions. This crisscross construction improves structural integrity and minimizes movement from moisture or temperature changes.[15][12]
| Feature | Solid Hardwood | Engineered Hardwood |
|---|---|---|
| Material | Single piece of wood | Layers of plywood/fiberboard + hardwood veneer |
| Construction | Solid plank | Cross-layered “engineered” core + real wood surface |
| Thickness | ~3/4 inch | 3/8–5/8 inch (standard) |
| Lifespan | 60–100+ years | 25–40 years (with proper care) |
| Sanding/Refinishing | Unlimited (within thickness) | 0–2 times (depends on veneer) |
| Moisture Sensitivity | High (prone to warping) | Lower, suitable in humid conditions |
| Installation | Nailed over wood subfloor | Floating, glue-down, nail-down, staple-down |
| Stability | Expands/contracts with moisture | Enhanced, minimal expansion/contraction |
Engineered hardwood's innovative structure makes it highly stable and resistant to moisture. This quality is especially crucial in kitchens, basements, and bathrooms—places where solid hardwood would struggle due to humidity and water exposure.[16][12]
With a wider range of installation options, including floating, glue-down, and nail-down methods, engineered hardwood can be laid over concrete, radiant heating systems, or pre-existing flooring—something most solid hardwood floors cannot accommodate. Its dimensional stability also allows for broader and longer planks, creating striking visual effects unachievable with solid wood.[3][4]
Since only the top veneer is premium hardwood, engineered options maximize the use of valuable hardwood species, reducing the impact on forests. The inner layers are often made from faster-growing, sustainable woods, making engineered options an environmentally responsible choice.[14]
Engineered hardwood is typically more budget-friendly due to efficient manufacturing and reduced solid hardwood usage. Furthermore, prefinished options minimize installation time and mess, appealing to both DIYers and professional installers.[17]
One of the standout advantages of engineered hardwood is its flexibility in installation, accommodating a broad range of environments and subfloors. Below are the four primary methods for installing engineered hardwood flooring:
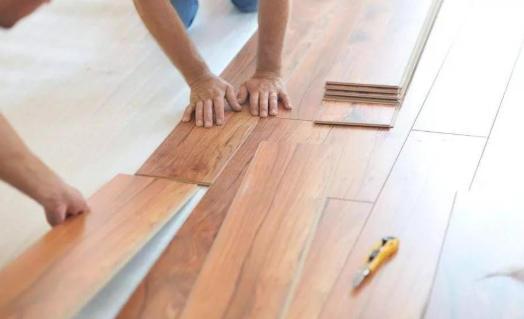
This is the easiest method for DIYers and involves locking the planks together (sometimes with glue) without attaching them to the subfloor:[4][3]
- Minimal subfloor preparation required
- Suitable over concrete, plywood, or old floors
- Allows for natural expansion/contraction
- May occasionally feel less solid underfoot
Here, specialty adhesives are used to bond flooring directly to the subfloor, ideal for high-traffic areas and installations over concrete:
- Results in a stable, solid feel
- Reduces noise
- More labor-intensive and time-consuming
- Professional installation often recommended
This method is similar to traditional hardwood installations, where planks are fastened to a wood subfloor using nails:
- Secure attachment, easy to repair sections
- Only for wood subfloors
- Recommended for experienced DIYers or professionals
A variation on nail-down installation using staples for fastening:
- Fastens quickly, suitable for specific engineered products
- Requires specialized staple gun
- Ensures secure physical connection to wood subfloors
Each technique varies in difficulty level and suitability for different subfloors. Manufacturer guidelines should always be closely followed to ensure warranty coverage and the best installation results.[6][3][4]
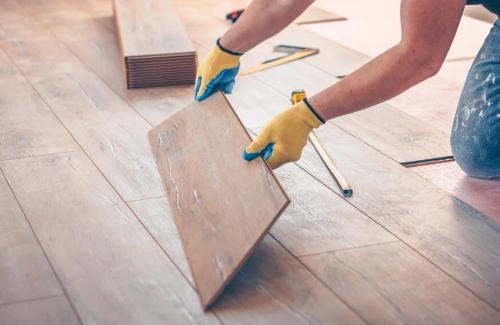
1. Acclimate the Flooring: Store the engineered planks in the room for 3–5 days before installation to allow them to reach the room's humidity and temperature equilibrium.
2. Prepare the Subfloor: Ensure the subfloor is clean, dry, flat, and structurally sound. Remove debris, repair uneven areas, and, if needed, install a moisture barrier.
3. Lay Underlayment: Roll out sound-dampening underlayment (if specified), especially for floating installations. Butt underlayment edges together and trim as needed.[4]
4. Plan Your Layout: Choose the direction of the flooring, ideally parallel to the longest wall, and measure the room to calculate plank placement.
5. Start the First Row: Place spacers between the wall and the first row of planks to allow for expansion. Lay the first row with the groove side against the wall.
6. Interlock Planks: Depending on the method, interlock the planks using tongue-and-groove connectors. Use tapping blocks to ensure tight seams.
7. Stagger Joints: For a natural look and structural stability, stagger end joints by at least 6–12 inches.
8. Fit Around Obstacles: Measure and cut planks to fit around obstructions with a jigsaw; leave expansion gaps around everything.
9. Finish Edges: Remove spacers, then add baseboards or quarter-round moldings to cover expansion gaps.
10. Let It Settle: Wait at least 24 hours before heavy use or placing furniture to allow adhesives or mechanisms to settle fully.[3][4]

Engineered hardwood offers unmatched design flexibility. Top veneers are available in an array of hardwood species, colors, surface treatments, and finishes. This means you can achieve traditional, rustic, modern, or bespoke looks with ease:
- Smooth or Wire-Brushed Finishes: For a sleek or slightly weathered appearance
- Hand-Scraped Planks: Introduce a vintage feel
- Gloss or Matte: Affect overall room ambiance; matte remains popular for its modern appeal
- Wide Planks: Can make rooms appear larger and emphasize natural grain patterns
Engineered hardwood's top layer is identical to the species named (e.g., oak, walnut), so the surface is always real hardwood—with all its unique knots, rings, and grain.[18][12]
Compared to solid hardwood, engineered hardwood is relatively easy to care for, though certain best practices enhance longevity and appearance:
- Routine Cleaning: Use a soft broom, vacuum (with no beater bar), or microfiber mop. Avoid excessive water.
- Damp Mopping: Use a lightly damp (not soaking) cloth for sticky spots. Never apply wet mops or steam cleaners.[12]
- Protective Pads: Place felt or rubber pads beneath heavy furniture to prevent dents and scratches.
- Humidity Control: Maintain humidity between 35% and 55% to prevent movement or warping. Use humidifiers/dehumidifiers if needed.
- Rug Placement: Area rugs at entrances and in high-traffic zones help reduce wear.
If the veneer is thick enough, minor scratches and dullness can be resolved with light sanding and refinishing. Check manufacturer guidelines before attempting repairs, as veneer thickness and finish type determine how much restoration is possible.[16]
While engineered hardwood is highly resilient, homeowners may encounter the following issues:
- Scratches: Minor scratches can often be treated with touch-up markers or a light refinishing if the veneer is thick enough.
- Moisture Swelling: Prolonged water exposure or excessive humidity can cause edges to cup or swell. Immediate cleanup of spills and controlled indoor environments mitigate risks.
- Fading: UV rays can fade hardwood finishes over time. Use blinds or curtains where sunlight is direct.
Understanding these challenges ensures that engineered hardwood remains a real-wood, high-value flooring investment for decades.
With technological advances, it's easy to confuse engineered hardwood with laminates or vinyl flooring. Here's how to distinguish it:
- Inspect Layered Construction: Remove a floor vent or trim piece and examine the plank edge. Engineered hardwood shows visible wood layers with a solid hardwood veneer on top.[19][20]
- Surface Texture and Grain: Real wood grain is unique and irregular; imitation products often have printed, repeating patterns.
- Sound and Feel: Engineered hardwood feels warm, dense, and solid underfoot—unlike hollow-sounding laminates.
- Professional Assessment: If in doubt, get a professional evaluation or watch educational videos for practical demonstrations (see video section).
Engineered hardwood's moisture resistance and flexible installation make it ideal for:
- Basements and Below-Grade Spaces: Unlike solid hardwood, it tolerates humidity and temperature changes.
- Kitchens and Dining Areas: Waterproof versions handle routine spills more effectively.
- Over Radiant Heating: Stable construction resists warping caused by fluctuating floor temperatures.
- Large Rooms: Wider and longer plank options create seamless, elegant spaces.
- Renovations: Ability to install over existing floors with minimal demolition.
Engineered hardwood is a genuine, real wood product that delivers the beauty and warmth of hardwood with technological advancements that enhance its performance, installation options, and sustainability. Its carefully engineered layers fortify it against common flooring challenges such as moisture and warping, making it suitable for nearly any room in the house. Whether for renovations, new builds, or design-driven upgrades, engineered hardwood offers a robust, attractive, and authentic flooring choice fit for modern living.

While engineered hardwood can be highly durable and last decades, solid hardwood typically outlasts it, especially because it can be sanded and refinished more times.[15][14]
Yes—if the veneer is thick enough (usually 4mm or more), it can be sanded and refinished once or twice, but thin veneer products have limited options.[14][15]
Look for natural wood grain, inspect for a multi-layered core beneath the visible surface, and check that the top layer is solid hardwood. Professional guidance is helpful for tricky situations.[20][21][19]
Yes, its engineered construction resists warping and swelling, making it ideal for humid or below-grade rooms where solid hardwood struggles.[12][16]
It can be installed using floating, glue-down, nail-down, or staple-down methods over different subfloor types, with floating and glue-down being the most versatile and DIY-friendly.[6][3][4]
[1](https://www.youtube.com/watch?v=0XRnkwxul40)
[2](https://www.reddit.com/r/DIY/comments/14pkfjz/engineered_hardwood_install_for_a_very_beginner/)
[3](https://www.flooringinc.com/blog/how-to-install-engineered-hardwood)
[4](https://www.thisoldhouse.com/flooring/21016471/how-to-lay-engineered-wood-floors)
[5](https://www.youtube.com/watch?v=6DLraWX4et8)
[6](https://californiaclassicsfloors.com/hardwood-floor/installation.aspx)
[7](https://tesoro-woods.com/2019/03/14/which-method-should-i-use-to-install-my-engineered-wood-floor/)
[8](https://www.reddit.com/r/Flooring/comments/rqt9m8/wide_engineered_hardwood_floor_installation/)
[9](https://www.somersetfloors.com/engineered-installation)
[10](https://pdmsview.shawinc.com/viewer/doc/3776)
[11](https://www.builddirect.com/blogs/expert-advice-on-flooring/solid-wood-vs-engineered-hardwood-how-are-they-different)
[12](https://www.bruce.com/en-us/resources/solid-vs-engineered-hardwood-flooring.html)
[13](https://www.hartco.com/en-us/resources/solid-hardwood-vs-engineered-wood.html)
[14](https://www.robbins.com/en-us/solid-vs-engineered-hardwood-is-one-better.html)
[15](https://twentyandoak.com/faq/common-questions/engineered-vs-solid-hardwood-flooring)
[16](https://www.nationalfloorsdirect.com/learn/articles/what-are-the-disadvantages-of-engineered-wood-flooring)
[17](https://flooring-franchise.com/press-releases/solid-wood-vs-engineered-wood-cost-use-these-7-factors-to-budget-for-a-new-floor/)
[18](https://vermontplankflooring.com/blog/solid-hardwood-vs-engineered-flooring/)
[19](https://www.lgkramerflooring.com/blog-1/articles/is-it-the-real-deal-how-to-tell-if-your-floor-is-real-wood)
[20](https://www.sacwalflooringcentres.com/blog/articles/is-your-floor-real-wood-7-simple-ways-to-find-out)
[21](https://www.youtube.com/watch?v=ufzar14ca6k)
Unveiling Mashonaste Wood: The Hidden Gem of South American Timber
Professional Q&A on African Movingui Wood - Hong Kong Senheda Wood Limited
Worry-Free Cross-Border Timber Procurement: Choose SENHEDA WOOD
Umbila: Value Analysis And Application Guide of A Rare African Hardwood
Wenge Has Become A Star Material in The Global Timber Market
Balsamo Wood: Nature’s Timeless Masterpiece for Luxury Craftsmanship