Content Menu
>> Key Characteristics That Affect Gluing
● Preparing Wenge Wood for Gluing
>> Sanding and Surface Conditioning
>> Test Fitting
● Selecting the Best Glue for Wenge Wood
>> Recommended Adhesives and their Unique Benefits
● Applying Glue: Proven Strategies
● Dealing with Porosity, Voids, and Glue Lines
● Common Mistakes and Troubleshooting
>> Solutions
● Advanced Techniques for Wenge Joinery
● Expert Tips and Additional Considerations
● Real-World Example: Dining Table Section Glue-Up
● FAQs
>> 1. What is the best glue for wenge wood?
>> 2. Do I need to clean wenge wood before gluing?
>> 3. Can I use regular wood glue for wenge?
>> 4. How long should I clamp wenge wood?
>> 5. How do I avoid glue lines on wenge?
Wenge wood is a highly prized African hardwood recognized worldwide for its dramatic appearance, formidable strength, and the luxurious finish it can bring to any project. Its rich, dark chocolate brown color, striking black streaks, and coarse texture make it a favorite among cabinetmakers, instrument builders, high-end furniture designers, and craftsmen seeking visual impact combined with durability. However, wenge's natural oils, unique porosity, and density pose distinct challenges—especially when gluing, which is critical for lasting joins and structural strength.
This comprehensive guide covers every aspect of gluing wenge wood, from understanding its behavioral properties to surfacing, adhesive selection, application methodology, finishing, and troubleshooting. Whether working on musical instruments, cutting boards, high-end furniture, or artistic panels, successful glue-ups with wenge require skill and careful attention to technical detail.

Wenge (Millettia laurentii) originates from Central Africa and has become synonymous with luxury woodworking. Its fibers contain natural oils and resins that inhibit some adhesives, and its open grain structure alternates between coarse/cellular and closed/dense streaks. These properties are responsible for both the beauty and the notoriety of wenge in craft and industrial use.
- Oily Surface: Similar to woods like teak or rosewood, wenge has natural oils in the grain which can block or weaken glue adhesion if not properly treated.[4][9]
- Porous Structure: Wenge has alternating bands; lighter bands are more porous and absorbent, while black streaks are dense and less absorbent, leading to uneven glue uptake.[6][4]
- Splinter Risk: Wenge is prone to splintering, so edge joints and surfaces must be handled carefully—splinters can affect joint integrity and safety.[1][6]
- Color Sensitivity: Glue lines from yellow aliphatic glues or poor technique can stand out visually on wenge's dark surfaces, compromising aesthetics.[1][6]
A successful glue joint starts long before adhesive application. The preparation methods below are recommended best practices to counter the natural challenges of wenge:
- Solvents for Oils: Wipe surfaces with denatured alcohol, acetone, or mineral spirits to remove surface oils. This step eliminates inhibitors and reveals fresh fibers for glue bond.[9][4]
- Drying: Allow the wood to dry fully after cleaning. Residual moisture can compromise adhesive curing, especially with water-sensitive glues.[4]
- Light Sanding: Use fresh 180–220 grit sandpaper to lightly abrade the joints. Avoid clogging the surface with dust—clean off with a tack cloth or compressed air.
- Avoid Over-Sanding: Excessive or uneven sanding can round over edges and reduce surface area for adhesion.
- Dry Fit: Before any glue application, assemble your parts and clamp them dry to ensure a tight fit and no gaps. This preemptively highlights any warping or misalignment.
Given wenge's oily nature, traditional yellow wood glues may struggle with adhesion. The following adhesives are recommended:
| Glue Type | Properties & Suitability |
|---|---|
| Titebond III | Waterproof PVA, bonds well with oily woods, flexible, invisible glue lines. |
| Epoxy (G/Flex, G-2) | Two-part, gap filling, highly water-resistant, strong bond, ideal for porous and dense woods, long open time for precise alignment. |
| Polyurethane Glue | Moisture curing, strong structural bonds, good for difficult woods, but foams and expands (requires cleanup). |
| CA (Cyanoacrylate) | Fills small pores, fast repairs, not suitable for major joints (becomes brittle over years). |
| Hot Hide Glue | Useful for veneer work and instrument building, offers flexibility but less suited for major joins in oily woods. |
- Choose waterproof or highly water-resistant variants for outdoor and spatially exposed projects.
- Avoid solvent-based glues or generic wood glues prone to showing yellow lines or failing over time on oily surfaces.
- Prefer epoxies with slow curing times for working with wenge, as they enable perfect alignment and accommodate the density of the wood, leading to strong bonds.[6][1]
- For surface repairs or pore filling, use medium viscosity CA glue mixed with sawdust, but do not rely on it for major joints.[3]

Getting glue onto wenge requires technique as much as choice. Proper coverage and pressure assure a robust bond.
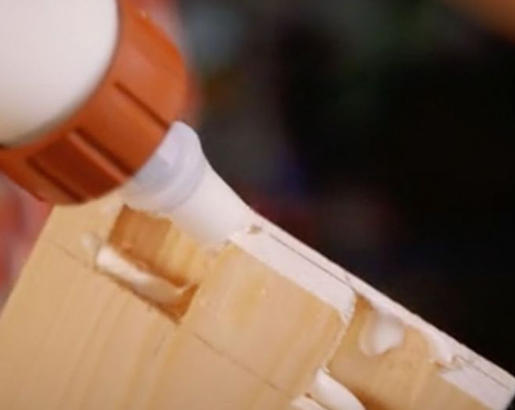
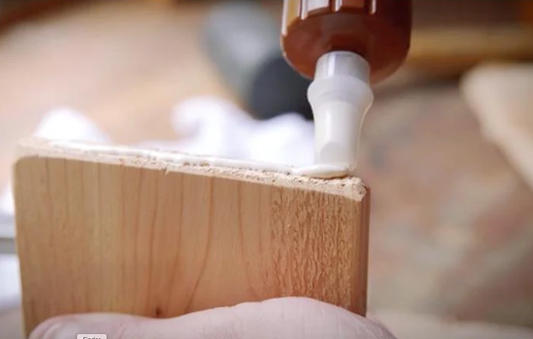
1. Spread Evenly: Use a brush, roller, plastic spreader, or thin stick to lay a consistent bead of glue on both surfaces. For edge joints, do not apply too much glue—ideally, you should see the wood grain through the glue layer.[8]
2. Join Immediately: Align the pieces and assemble quickly to ensure no glue sets prematurely.
3. Squeeze-Out Control: Excess glue squeeze-out is desired, indicating full penetration. Mask off surrounding areas to avoid cleanup headaches and potential staining. Remove excess glue promptly with a scraper or, if accessible, a drinking straw for inside edges.[7][8]
Clamping is critical for wenge, given its hardness and variable pore structure:
- Pressure Guidelines: Use parallel bar clamps, applying firm but not excessive pressure to prevent starving the joint of glue, especially with epoxy systems where gaps are filled.[5][6]
- Cauls and Pads: Distribute pressure with wooden cauls. This prevents clamp marks, bruising, or splintering on the wenge surface.
- Clamp Time: Follow manufacturer advice—most PVAs need 30–60 minutes clamped, while epoxies and polyurethanes work best after 6–24 hours of sustained pressure for full cure.[5][4]
- Alignment: Check alignment after initial clamp pressure, making micro-adjustments as needed before full tightening.
Wenge's open pores and color variation can cause glue to seep into the grain and leave lines or voids:
- Pre-Seal with CA: Fill large pores or holes in wenge with medium CA glue and sawdust before the final glue-up. This reduces visible voids and prepares a more uniform gluing surface.[3]
- Bleaching Effects: If artistic bleaching is intended, perform after glue-up and initial surface prep.
- Edge Joint Technique: For edge joining panels, choose boards with matching grain to reduce glue line visibility and improve structural uniformity.[5]
Once clamped and cured, surface finishing brings out the full beauty of wenge:
- Sanding Sequence: Progress from 180 up to 800 grit paper to polish off any remaining glue residue and splinters. Wet sanding with finishing oils or slurry results in an exceptionally smooth finish.
- Finishes: Penetrating oils (e.g. tung oil, Danish oil) and premium waxes showcase the grain, while film finishes like lacquer or polyurethane protect but may obscure some visual depth.
- Avoid Water-Based Finishes: Wenge can react poorly, raising grain or causing spots; test a small section before committing.[6]
Despite careful planning, challenges can occur:
- Insufficient Cleaning: Failure to remove enough oil can lead to sudden joint breakdown, sometimes months after assembly.[9][4]
- Excessive Clamping: Over-tightening can squeeze out all glue, especially epoxy, resulting in brittle joints and delamination.[1][4]
- Inadequate Pressure: Too light pressure prevents full glue contact, especially important for porous and open-grained boards.
- Wrong Adhesive: Using regular yellow or white wood glue on wenge can leave visible, weak, or uneven joints and glue lines.[1][6]
- Clean joints with fresh solvent wipes immediately before glue-up.
- Use long open-time adhesives for tricky panels, giving time for careful alignment.
- Re-sand and fill pores if glue-ups fail; use correct products for re-bonding.
Experienced woodworkers often employ advanced joinery strategies for wenge:
- Mortise and Tenon: Deeper mortises with glue applied only to mortise walls can improve joint strength and reduce squeeze-out staining.[7]
- Grooved Edge Joints: Cutting shallow grooves near the joint can intentionally create voids to collect squeeze-out, making clean-up easier.
- Dovetail and Box Joints: Apply glue only to one mating surface, let surplus squeeze out to the outside edge where it's easier to clean.
- Tool Maintenance: Always use sharp blades and fresh abrasives to minimize splintering and rough surface damage during preparation.[10][3]
- Wear Gloves: Protect hands from wenge splinters and glue chemicals.
- Avoid Metal Fasteners in Wet Glue: Fasteners and clamps left on wenge with wet glue may cause black streaking due to chemical reactions between glue and tannins.
An exemplary video guides through gluing up a wenge dining table section, featuring detailed explanations on glue choice, clamp pressure, grain alignment, and cleanup. Visual aids show glue squeeze-out, joint tightness, and finished results. The discussion includes prepping with acetone and timing clamping for optimal results. Watching such processes offers practical knowledge for successful wenge glue-ups.[5]
Gluing wenge wood challenges even experienced woodworkers due to the species' density, oily surface chemistry, and striking color contrast. These factors demand careful preparation—cleaning with solvents, attention to fit and sanded surfaces, and judicious selection of modern, water-resistant adhesives tailored for tropical hardwoods. Proper glue application, clamp pressure management, and prompt squeeze-out removal are essential steps to achieve invisible, enduring joints. Finishing with appropriate oils or wax polishes brings out wenge's signature depth and visual drama, while expert joinery and troubleshooting safeguard structural integrity for years to come.
By following the step-by-step advice in this article and leveraging both hands-on and video resources, every builder can master the art of gluing wenge wood for flawless, resilient, and visually stunning results.

Waterproof PVA (like Titebond III) and high-quality epoxy adhesives (such as G/Flex or G-2) are considered ideal, delivering strong, durable joints and invisible glue lines for this oily, dense wood.[4][9]
Yes, always. Wiping with acetone, denatured alcohol, or mineral spirits removes natural oils that impede glue adhesion, providing fresh surfaces for bonding.[9][4]
Avoid standard yellow or white wood glues. They often leave an obvious glue line and may not bond effectively with oily surfaces. Use Titebond III, epoxy, or polyurethane glues for optimal results.[9][1]
Clamp joints for at least 30–60 minutes with PVAs, and up to 24 hours for slow-setting epoxies. Follow glue manufacturer guidelines and adjust for temperature/humidity as needed.[4][5]
Pre-seal large pores with medium CA glue and sawdust before glue-up, clean up excess glue promptly, and use matching grain boards for edge joints to disguise lines. Sand and finish with penetrating oils to blend joints seamlessly.[3][6]
[1](https://www.finewoodworking.com/forum/working-with-wenge)
[2](https://www.youtube.com/watch?v=mmH8eGEuIG8)
[3](https://www.kitchenknifeforums.com/threads/working-with-wenge-and-other-dense-woods.61831/)
[4](https://woodweb.com/knowledge_base/Gluing_Wenge__721702.html)
[5](https://www.youtube.com/watch?v=j5spGlwhP2Y)
[6](https://www.finewoodworking.com/forum/working-with-wenge?srsltid=AfmBOoqLD_GbfmvU9M6ddU3ASRu1h897bS0mE2HwgEPm5ZHAmFnQer_p)
[7](https://www.leevalley.com/en-us/discover/woodworking/gluing-strategies-and-techniques)
[8](https://canadianwoodworking.com/techniques_and_tips/gluing-strategies-2/)
[9](https://www.wood-database.com/gluing-oily-tropical-hardwoods/)
[10](https://www.facebook.com/groups/woodworkingforbeginner/posts/2933055383515734/)
Unveiling Mashonaste Wood: The Hidden Gem of South American Timber
Professional Q&A on African Movingui Wood - Hong Kong Senheda Wood Limited
Worry-Free Cross-Border Timber Procurement: Choose SENHEDA WOOD
Umbila: Value Analysis And Application Guide of A Rare African Hardwood
Wenge Has Become A Star Material in The Global Timber Market
Balsamo Wood: Nature’s Timeless Masterpiece for Luxury Craftsmanship